

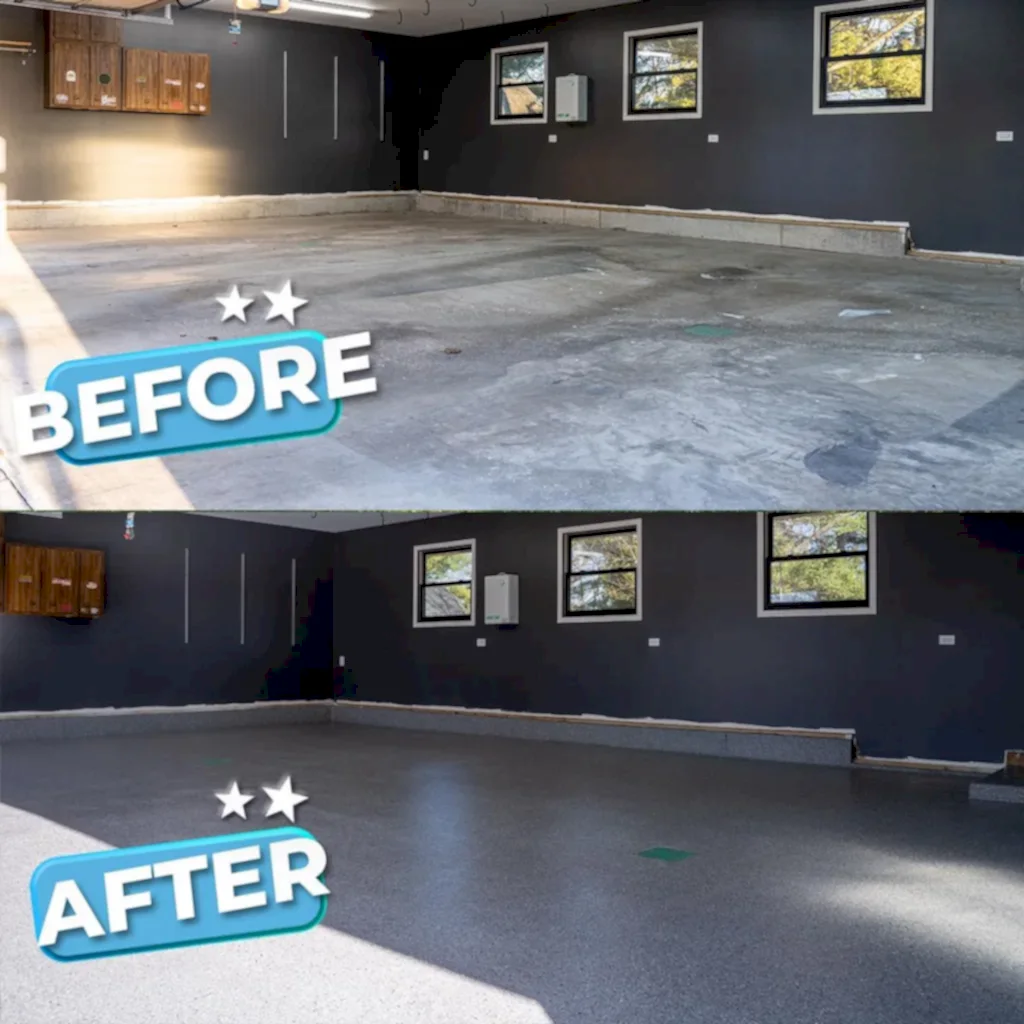
Have you ever imagined turning your garage into a clean, durable, and stylish space? At Concrete Hero, we recently completed a residential garage floor coating project in Elgin, Illinois, that did just that. Using our signature pebble hybrid flake, we transformed a worn-out garage floor into a stunning and functional surface. In this blog post, we’ll take you through the entire process, step by step, and share insider tips to help you understand what goes into a professional garage floor coating.
I’m Pete Catalano, the owner of Concrete Hero, based in the Chicagoland suburbs. Our family has over 40 years of experience in the concrete industry, and our team is passionate about delivering high-quality coatings that stand the test of time. Whether you’re considering a DIY project or looking for professional help, this guide will show you what’s involved and why our concrete coating system is a top choice for homeowners. Plus, we’ve attached a walkthrough video below so you can see the transformation in action!
How we Install a Concrete Coating in a Elgin Garage
Step 1: Preparing the Garage Floor
Every great garage floor coating starts with proper preparation. This is the most time-consuming part of the job, but it’s also the most important. Without thorough preparation, even the best coatings will fail over time.
For this Elgin concrete coatings project, we used a 20-inch Lavina propane-powered grinder. This 900-pound machine effortlessly grinds the concrete, creating the ideal surface for coating adhesion. Proper grinding is essential because it opens up the concrete’s pores, ensuring the coating bonds securely. If you’re thinking about doing this yourself, beware—skipping this step or using subpar equipment can lead to peeling and a short-lived floor. Professional-grade tools make all the difference.
After grinding, we carefully inspect the floor for damage. In cold-weather climates like Elgin, salt and moisture often leave garage floors with cracks and pitting. Preparation isn’t just about smoothing the surface—it’s about setting the stage for a long-lasting result.
Step 2: Repairing Damage for Longevity
Once the floor is ground, we move on to repairing any damage. In the Elgin garage, we found typical wear and tear caused by years of use and harsh winters. Addressing these imperfections is crucial for both appearance and durability.
We used a fast-setting polyurea material, which we call a “mender,” to fill cracks and holes. This product sets in just 20 minutes, allowing us to keep the project moving efficiently. In areas like Elgin and its surrounding suburbs, where freeze-thaw cycles can worsen cracks, repairing damage prevents future deterioration. After the mender sets, we grind the floor again to ensure a smooth, even surface. This extra effort guarantees a flawless foundation for the coating.
Step 3: Applying the Base Coat
With the floor prepped and repaired, it’s time to apply the base coat, also known as the primer. For this project, we chose a high-solids polyurea with 98% solids. This material is incredibly strong and flexible, making it perfect for garage floors that might shift slightly with temperature changes.
Polyurea is a standout choice compared to traditional epoxy. It’s the same durable material used in truck bed liners and commercial roofing, offering superior resistance to wear and cracking. In cold climates like Illinois, where concrete movement is common, polyurea’s flexibility ensures the coating stays intact. Our team applies the base coat with precision, creating a solid foundation for the next steps.
Step 4: Adding the Pebble Hybrid Flake
Here’s where the magic happens—adding the pebble flake.
We broadcast the pebble hybrid flake onto the wet base coat until the floor is fully saturated, a method we call “full coverage.” This ensures the base coat is completely hidden, creating a seamless, textured finish. The flakes serve three purposes: they provide traction for safety, add an extra layer of protection against wear, and give the floor a modern, sophisticated look. I like to say it gives it a showroom finish. In this garage, the hybrid flake blended perfectly with the space, offering a practical yet eye-catching result.
Want to customize your own floor? Check out our garage floor coatings page to explore the possibilities!
Step 5: Scraping and Cleaning for a Smooth Finish
After the flakes set—usually within an hour, though sometimes we return the next day—we scrape and clean the floor. This step is critical for a smooth, professional finish.
Using specialized tools, we remove excess flakes and smooth out any that didn’t land flat. Without scraping, the floor could feel rough or even pose a risk if you walk barefoot. Once scraped, we vacuum the surface with a HEPA filter vacuum to eliminate dust and debris. This thorough cleaning ensures the floor is pristine and ready for the final layer.
Step 6: Applying the Polyaspartic Top Coat
The final step is applying the top coat, and for this project, we used a polyaspartic coating—the gold standard for garage floors. Unlike epoxy, which can yellow over time when exposed to sunlight, polyaspartic stays clear and vibrant. This was especially important for the Elgin garage, which has windows letting in plenty of natural light.
Polyaspartic is also highly resistant to scratches, chemicals, and abrasions, making it ideal for a busy garage. It’s tougher and more flexible than epoxy, reducing the risk of cracking. Our team applies it carefully with squeegees and rollers, ensuring an even, glossy finish. To dive deeper into why polyaspartic is a top choice, visit this resource from Sherwin-Williams.
The Result: A Beautiful and Durable Garage Floor
The before-and-after difference in this Elgin garage is night and day. What was once a cracked, worn-out floor is now a sleek, durable surface that’s easy to clean and built to last. The pebble hybrid flake adds a unique texture, while the polyaspartic top coat seals in the beauty and strength.
At Concrete Hero, we’re proud to deliver transformations like this across Chicagoland. Curious about other projects we’ve completed? Take a look at our garage floor transformations for more inspiration.
Maintaining Your New Elgin Garage Floor
One of the best perks of a coated garage floor is how low-maintenance it is. Regular sweeping and occasional mopping with a mild detergent will keep it looking brand new. Avoid harsh chemicals or abrasive scrubbers, which could harm the top coat. For more advice, see our guide to caring for your garage floor.
Average Price for an Epoxy Concrete Coating in Elgin
The size of the garage and condition of the floor play a part in determining the price of a concrete coating in Elgin. However on average a home owner living in Elgin IL can expect to pay anywhere from $5 to $7 per square foot for a new concrete coating installation. Some additional items that can increase the price would be coating the vertical walls around the garage and also the step leading inside. Lastly, the type of material used for the basecoat and topcoat will also play a role in the final price. Watch our video How Much Should I Pay For a Concrete Coating to learn more
Epoxy Flooring Company Near You
If you are in need of a local epoxy flooring company to install a concrete coatings in your Elgin garage we here at Concrete Hero would be a good place to start. We are located 5 minutes from Elgin and have completed many garage floors in your area. Just give us a call and complete our free quote form.
